
Read this article in: Portuguese (Português) · Spanish (Español)
Defeating the Traitor Lord in Hollow Knight requires more than just brute force, as the fight takes place in a crucial spot in the Queen’s Gardens and blocks access to the White Lady. To succeed, it is essential to master his attack patterns, especially the Dive, which is dangerous and occurs in two distinct parts. Remember that, besides being a combat challenge, defeating him also has a narrative purpose, as he is responsible for opening the door to the Tower of Love, indicating that preparation and tactical knowledge are key to overcoming this obstacle.
The significance of the encounter with the Traitor Lord is marked both by his role in the narrative and by the game’s release context. He is a major boss that prevents the player from advancing in an area as lore-rich as the Queen’s Gardens. The journey through Hallownest, whose development and release dates are recorded at times such as September 2015, February 2017, and finally, September 21, 2020, is full of challenges like this. His confrontation is not only a test of skill but also a major milestone of progress that the player must overcome to advance the story.
In this complete guide, we unravel every aspect of the fight against the Traitor Lord. You will learn in detail who he is and what his historical role in the kingdom is. We will cover the exact location and how to reach the challenge, in addition to listing the ideal equipment and upgrades to maximize your chances of survival. Finally, we detail the attack patterns, provide a step-by-step strategy for victory, and explain the rewards you will receive after defeating him.
Key Points
- Complex Antagonist: Former leader of the Mantis Tribe, exiled to Queen’s Gardens due to dissatisfaction with Hallownest.
- Narrative Function: He is the guardian of a key that unlocks the door to the Tower of Love, making him a crucial progression point.
- Combat Challenge: He is a high-level boss, with 800 HP (Godhome), requiring tactical precision and pattern recognition.
- Mandatory Preparation: The player must use Isma’s Tear to gain immunity to acid, which is vital for survival.
- Combat Strategy: The fight requires a focus on mobility, area-of-effect (AoE) damage, and the tactical use of invulnerabilities.
Who is the Traitor Lord and his role in the story
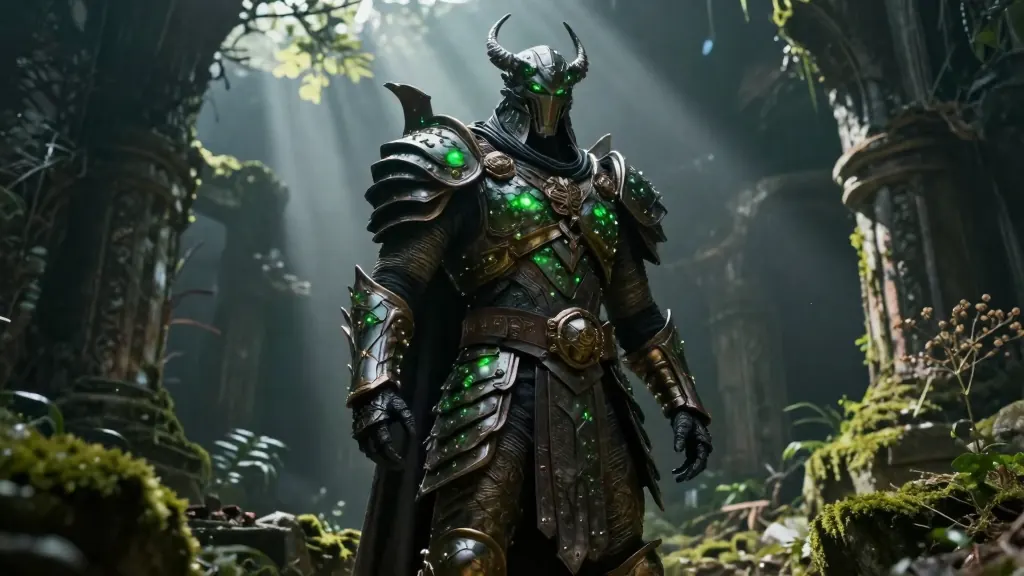
The Traitor Lord is not just a random enemy guarding a path; he is a central figure in the narrative conflict of Hallownest. Originally, he was one of the leaders of the powerful Mantis Tribe, alongside his sisters. His journey, however, was marked by a deep resentment against the Kingdom of Hallownest itself. This discontent was not merely political, but personal, extending even to the disapproval of his daughter’s relationship with the Grey Mourner, whom he considered a stranger or outsider. The complexity of the bonds and conflicts in Hallownest is reflected even in combat challenges, where it is crucial to know the strategies to defeat the Winged Nosk.
The tension surrounding his loyalty led to a breaking point. The Traitor Lord and his followers embraced the Infection in search of greater power, which resulted in their exile from the Mantis Village. They eventually settled in Queen’s Gardens, a place of beauty and refuge. Their goal was to take control of the gardens and expel the White Lady from her sanctuary. However, their plans were thwarted by the presence of Dryya, the guardian of the White Lady, who, despite having a harsh demeanor, was known for her wisdom and care. Although they were contained, the Traitor Lord and the exiled Mantis remained in the gardens, driven by a basic, territorial, and violent instinct.
The Role as Antagonist
This story of disillusionment and exile gives the Traitor Lord a complex antagonist role. He represents not only a physical obstacle but the manifestation of internal conflicts and structural flaws within Hallownest. His encounter with the player is a test that requires the adventurer to understand the world’s context in order to survive.
The depth of his past is reinforced by details such as his daughter’s resting place, whose tombstone can be found in Queen’s Gardens, just above the Stag Station, in a vine-covered cave. Furthermore, the combat itself is loaded with lore. When the player confronts the Traitor Lord in a large structure on the upper edge of the wild gardens, the encounter is immediate and violent. The way he is defeated also carries meaning: if the player kills him alone, the Infection erupts from him, causing an explosion. If Cloth defeats him, the manifestation of the Infection is smaller, and his body disintegrates into pieces.
In summary, the Traitor Lord is a symbol of deviation and despair. He is not just a boss with 800 HP; he is the guardian of a secret and the catalyst for a confrontation that requires the player to navigate not only his attack patterns—such as the *Dive* or the *Dancing Glaive*—but also his narrative weight, understanding that he is challenging a tragic and violent exile.
Where and How to Reach the Challenge
Upon reaching the confrontation point with the Traitor Lord, the player encounters one of the most challenging and narratively dense sections of Queen’s Gardens. This encounter is not a random detour, but rather a crucial point of interest that marks the boundary between the wildest areas and access to important new regions of Hallownest. The Traitor Lord, more than just a mere guardian, establishes a physical and emotional barrier, blocking the path to the White Lady and, more specifically, to the Tower of Love. Mastering these confrontations requires more than strength; strategy is needed, and for those looking to improve their skills in boss battles, guides like advanced strategies for boss fight are essential.
The Path to Confrontation
The exact location of the challenge is situated in Queen’s Gardens. To understand the obstacle, it is vital first to understand what is being guarded. The Traitor Lord holds a key that, according to the item’s effects, has the power to unlock the door to the Tower of Love. Thus, the combat is not merely a test of strength, but a narrative necessity for the player’s progression.
However, acquiring this key is not trivial. The path to the confrontation is intrinsically linked to the acquisition of a specific item: Isma’s Tear. This component is the key piece for the player to progress and reach the Traitor Lord. Obtaining the Isma’s Tear requires the player to return to or travel to the Isma’s Grove area, located in the Royal Waterways. It is in this location that Isma’s body is found, whose strength and nature seem related to acidity, and whose remains are the source of the precious item.
Preparation and Objective
The journey to the challenge, therefore, requires a sequence of exploration: first, collecting the Isma’s Tear in Isma’s Grove; next, using this resource to obtain the item that grants access to the Tower of Love. The Traitor Lord positions himself as the guardian of this key, forcing the player to face combat at the most strategic point in Queen’s Gardens.
It is important to note that, besides being a battle against a powerful boss (with 800 HP in its Godhome version), the encounter is a catalyst for progression. Victory not only grants physical access to the Tower of Love but also reaffirms the Traitor Lord’s role as a symbol of deviation and despair, whose defeat is fundamental to the White Lady’s journey. Managing this flow of items and overcoming this obstacle are elements that solidify the Hallownest experience, transforming combat into a stage of solving exploration and narrative puzzles.
Ideal Preparation: Equipment and Upgrades

Preparing for the confrontation with the Traitor Lord requires a level of mastery that transcends mere brute force. It is a high-level challenge, set within the theme of Queen’s Gardens (Action) Furious Gods, and preparation must focus on resilience and area damage capability, given the intense and multifaceted nature of the combat. There is no room for complacency; every resource must be optimized to ensure the player is ready to face an opponent with complex resistances and attack patterns.
Mandatory Equipment and Survival
The starting point for any attempt at victory is biological preparation. It is imperative that the player has access to and utilizes Isma’s Tear. This item is not just an accessory; it grants acid immunity, a vital resource, since the origin of the challenge itself is intrinsically linked to the environment of Isma’s Grove. The ability to ignore acid damage ensures that the player can maintain focus on the opponent without worrying about an elemental weakness that might be exploited.
Recommended Builds and Upgrades
Given the high level of challenge and the need for constant movement, builds must prioritize mobility and control of the combat space. The Traitor Lord demands a player who not only attacks but also knows how to dodge complex attack patterns. We recommend focusing on upgrades that enhance area damage (AoE) and improve evasion:
- Increased Mobility: Upgrades that allow for longer, faster jumps or add a dash element are crucial. Constant evasion is the primary defense tool against the boss’s attacks.
- Area Damage (AoE): Abilities that hit or attack in a cone are ideal. In intense combat, AoE allows the player to minimize exposure time, hitting the enemy even while repositioning.
- Damage Consistency: It is essential that the damage dealt is consistent, as the Traitor Lord’s health in its Godhome version reaches 800. Builds that ensure a stable flow of damage, rather than peaks and valleys, drastically increase the chances of success.
In summary, the combat philosophy against the Traitor Lord must be one of calculated risk. The player should adopt a defensive-offensive stance, using high mobility to maintain ideal distance while applying area damage whenever possible. The combination of Isma’s Tear for basic survival, along with upgrades that maximize evasion and area damage, is the safest path for the player not only to survive but also to deliver the final blow against this complex antagonist.
Attack Patterns and Combat Mechanics
Confronting the Traitor Lord is less a test of brute strength and more an exercise in pattern recognition. Given the nature of the combat—a large enemy in a relatively small arena—and his attack frequency, the player must act with surgical precision. Mastering the fight requires the Knight not only to react to the blows but to anticipate the transitions between them, turning every attack into an opportunity window for counter-attacking.
Analyzing Attack Patterns
The Traitor Lord’s arsenal is varied and highly dangerous. Among the most notorious attacks are the Dive and the Ground Pound. The Dive, for example, is a two-part movement: first, the vertical jump, and then the dive itself. Both stages are dangerous, and the dive always occurs at an angle of approximately 45 degrees, covering about 25% of the arena. It is crucial to note that the mechanics of this attack require precise timing, similar to what the player learns against the Mantis Traitors, forcing a lateral dodge so that the dive passes over the Knight.
Other attacks to master include the Dash, where he quickly advances and sweeps with his claws, covering about a third of the arena, and the Ground Pound. The latter is particularly devastating because it generates a massive shockwave that travels across the entire arena, from floor to ceiling. It is important to know that this attack is only used after the Traitor Lord reaches 500 HP. To survive these shockwaves, using invulnerability, such as that obtained by the Shade Cloak or the Desolate Dive, is mandatory, as the waves reach the full height of the arena.
Evasion and Tactical Use of Attacks
In addition to these physical attacks, there is the Dancing Glaive attack, in which he throws two orange wind axes in tandem. These axes follow slightly different cosine wave patterns and persist for about three seconds. Taking a hit from one of the axes causes only 1 damage (Mask), but if the Knight is caught by the Traitor Lord’s claws during the launch, the damage is doubled. Combat is a constant cycle of calculated risk: when the Traitor Lord is farther away, he tends to use the Dancing Glaive and the Ground Pound. However, if the Knight maintains a relative and safe distance, the attack pattern tends to be more predictable, limited to Dash and Dive.
To maximize effectiveness, the player must use the moments of brief invulnerability windows between attacks to counter-attack. Furthermore, the use of amulets like the Shape of Unn Charm can be tactically employed to move between the wind axes while healing, demonstrating that mastery against the Traitor Lord lies in the combination of mobility, pattern knowledge, and the strategic use of invulnerability resources.
Step-by-Step Strategy for Victory

The confrontation against the Traitor Lord is less a test of power and more an exercise in tactical precision. With a resistance that can reach 800 HP, and an arsenal of attacks that covers much of the arena, the fight requires the Knight to adopt a defensive and calculated stance. The key to victory lies in understanding the boss’s rhythm and exploiting the brief windows of invulnerability he offers. Remember that most of his physical attacks, such as the Dash and Ground Pound, are designed to keep the player at a distance, forcing the use of evasion maneuvers and strategic positioning.
Mastering the Combat Rhythm and Space
Maintaining the ideal distance is the first step to ensuring survival. The Traitor Lord tends to use long-range attacks, such as the Dancing Glaive, when the player gets too far away. Therefore, the goal is not to force close combat, but rather to flank the boss, using the environment to create a safe space for pinpoint counterattacks. The fight should be viewed as a dance of evasions and rapid attacks, where every move counts.
To turn this theory into practice, follow this sequence of tactical actions:
- Maintain a safe distance: Do not get too close, but also do not get so far away that it triggers the Dancing Glaive. The ideal distance allows you to monitor the attack patterns without being constantly hit.
- Anticipate the dive (Dive): When the Traitor Lord jumps and dives toward you (an attack that covers about 25% of the arena), never try to attack. Move laterally (left or right) in the direction of the attack so that it passes over you and loses its target.
- Use the environment to reposition: Columns and walls are your best friends. After dodging a powerful attack, use them as cover and as a starting point for your next move, ensuring you do not remain in an impact zone.
- Fight the Mantis Traitors in groups: It is inevitable that you will be ambushed by Mantis Traitors. Defeat them in groups, but never get distracted. Keep your focus on the Traitor Lord, as he is the main and most dangerous threat.
- Prioritize dodging area attacks: Against the Ground Pound, for example, the only way to survive is to have invulnerability, such as that granted by the Shade Cloak or Descending Dark. Use these mechanics to pass through the shockwave without interruption.
- Counterattack during pauses: The Traitor Lord’s attacks are varied. Identify the brief moments of pause between one attack and the next. It is during this window of invulnerability that you should attack with the Nail, maximizing damage.
Remember that the strategy is not to attack the boss in a single explosive burst, but rather to maintain rhythm. Mastery lies in using the Dash (quick advance) and the jump not to attack, but to reposition and dodge area attacks. By mastering pattern recognition—and never attacking during jumps—you transform the confrontation into an exercise in space control, paving the way to victory.
Rewards and What to Do After the Battle
Defeating the Traitor Lord is not just a combat achievement; it is an essential narrative milestone in your journey through Hallownest. The reward for this high-level challenge transcends mere combat experience, as the confrontation results in the acquisition of an item of extreme importance for the story’s progression: a Key. This item, classified as a Key, is the catalyst that will allow the player to access a crucial area of the map.
Unlocking the Love Tower
The main effect of this Key is the unlocking of the door leading to the Love Tower. This location, being a mandatory passage point, represents the next major geographical and narrative challenge. Passing through the Love Tower is crucial, as this is where the player will have the opportunity to confront the Collector. The story’s progression requires the player to reach this point of convergence, and the Key obtained from the Traitor Lord is the narrative mechanism that guarantees this access.
It is important to understand that the sequence of events in Hallownest is highly linear and dependent on key items. Without the acquired Key, the Love Tower remains inaccessible, blocking the path to subsequent content and the confrontation with the Collector. Therefore, success in fighting the Traitor Lord is not merely a test of skill, but a mandatory passage condition for advancing the narrative.
What to Expect After Victory
After defeating the Traitor Lord and securing the Key, the player’s focus must immediately shift to exploring the unlocked area. The Love Tower is a location of great significance, and the fight against the Collector is the next climax of the journey. This new challenge requires different preparation than that used against the Traitor Lord, although tactical precision and mastery of attack patterns remain vital. Progress, however, is marked by increasing challenges, and for those looking to anticipate the most complex obstacles, such as the Broken Vessel in Hollow Knight, it is essential to review final strategies.
The reward, therefore, is twofold: the Key itself and the progression of knowledge about the world. The player not only advances in the story but also receives a map of possibilities, knowing that the next major obstacle, the Collector, awaits in a place of deep emotional and narrative significance. Thus, the confrontation with the Traitor Lord solidifies the player as a character capable of overcoming both physical and narrative barriers, paving the way for the final chapters of the adventure.
Frequently Asked Questions
Is a specific upgrade needed to defeat the Traitor Lord?
Yes, having Isma’s Tear for acid immunity is imperative, a vital resource. Furthermore, builds must prioritize mobility and area of effect (AoE) damage. Combat requires the player not only to attack but also to know how to dodge complex attack patterns.
What is the best time in the campaign to face the Traitor Lord?
The confrontation is a crucial point of interest in Queen’s Gardens, marking the boundary between wild areas and access to new regions. It functions as both a physical and narrative obstacle, fundamental to the White Lady’s journey progression.
What happens if I fail to defeat him on the first attempt?
The text does not detail the consequences of failure. However, it emphasizes that the combat is a high-level challenge that requires biological and tactical preparation. Victory depends on mastering pattern anticipation and resource management, not just brute force.
Why does the Traitor Lord guard the key to the Tower of Love?
He holds the key because the combat is a catalyst for narrative progression. The Traitor Lord establishes a physical and emotional barrier, and the player must overcome this challenge to obtain the item that grants access to the Tower of Love, following the world’s logic.
Is there any way to skip the fight against the Traitor Lord?
The text treats the encounter as a crucial point of interest and a narrative necessity for progression. It is not a random detour, but rather an obstacle that must be overcome for the player to advance and achieve the goal of accessing the Tower of Love.
Conclusion
The confrontation with the Traitor Lord transcends a mere battle against an opponent with 800 health; it is the climax of a complex narrative arc. Far from being a random obstacle, it materializes the despair and exile of the ancient Mantis Tribe, functioning as a guardian that seals access to the Tower of Love. Overcoming this boss therefore requires the player to integrate the lore of Queen’s Gardens—understanding the internal conflicts of Hallownest—with mechanical mastery. His defeat is not just a power milestone, but a catalyst for progression.
To face this barrier, preparation is crucial. It is imperative that the adventurer masters resources like Isma’s Tear, guaranteeing acid immunity, and that their builds prioritize mobility and area of effect (AoE) damage. The combat thus becomes a test of resource optimization and constant dodging against complex attack patterns, requiring the player to think as much about strategy as they do about strength. Victory, therefore, solidifies the journey, transforming a violent encounter into a stage of puzzle-solving for exploration and narrative.
By understanding the narrative weight behind every blow and every resource, the player not only advances physically across the map but also delves into the tragedy of Hallownest. The Adventurer’s journey continues, and it is in the fusion between combat mastery and understanding the story that the true power of Hallownest is revealed.